Showing posts with label DIY Decor. Show all posts

Tuesday, April 1, 2014

Simple Easter Decor


While I really enjoy decorating my home for the holidays sometimes it is nice to be able to do it with simple items that can be put up, enjoyed, and taken down with little fuss. 

This year that is how it has worked so far. I have a shelf full of Easter projects/decor items that I tell myself I'll get to every week. An Easter egg wreath, a burlap bunny table runner, decorative easter eggs to hang on an "Easter Tree" that I have ruined once already and must re-do, a giant Easter Egg that I wanted to paint gold that is at the moment half robin egg blue and half the paper mache' it was created from, and last but certainly not least a topiary that I am sure I can make with items around the house. 

But life happens and as the above mentioned projects all wait for their turn to be painted, glued, and stenciled upon I did manage to dig up a few Easter/Spring items and get them up, and even if I don't get to my other projects I have enjoyed the feeling of spring around the house.


White blossoms I got from Michaels Craft store a few years ago.

Dried roses from my husband in a yellow robin tin, and yellow plates. I love yellow for spring and summer.


A sprig of eggs and leaves from Michaels Craft Store Dollar bin dresses up an outdoor wreath.


Friday, January 31, 2014

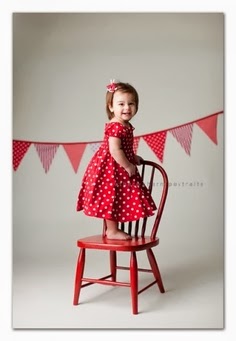
DIY Valentine Banners for Photos or Home Decor

http://thosetinytoes.blogspot.com/2013/01/diy-valentine-nut-wreath.html
I prefer to see Children's Photography done as simple as possible. For the most part I don't like to see props of all kinds in the photo I want the focus to be on the child and the stage of life they are in. Just a personal preference I have. However, the one time I let this rule fall to the wayside is during the Holidays. Holiday photos can be done with simple props that show the season as well as the child. Parents, Grandparents, and the children themselves will love having these pictures now and in the future as they look back on children they once were. 


Should you find yourself looking to the Valentine season and wanting to try your hand at some Valentine sessions for either your children or clients, consider purchasing or making a garland for your session. It adds that Valentine flair and leaves no question as to what time of year it is. Hearts not your thing? There is more to Valentine garlands than hearts. Read on for the classic heart banners, twists on the classic and some new ideas you have not seen before. Many of these are easy Do It Yourself projects that can be done in an afternoon. I hope you find some ideas you can use or change up a bit to fit your style.

Simple Paper Hearts
Don't make it complicated. This simple heart banner allows the photo to show that it is Valentines Day quite easily and still leaves the focus on her cute smile and excitement. Simply cut out 5 or 6 hearts and attach them to a string. 

Bethany F Photography
This heart garland is simple to assemble and ends up dressing up a photo session quite well. Use the same colored paper on each strand or alternate every other one red/white or pink/white, or any color combination you are going for. These can then be strung as a garland or as separate pieces from the ceiling for a mobile effect.
www.londonbeep.com
Again simple hearts on string. Use different colors and hang them as a backdrop if you don't use them as a garland.

www.loveitsomuch.com
A vintage look; string hearts of differing sizes together. Or use a vintage stamp on weathered paper to create an old time feel.
www.abiteast.typepad.com
littlelovables.blogspot.com 
Not just red and white. Think outside the box. Hearts say Valentines even if they are not red and white. Try unique color combinations together the results might surprise you.

ishouldbemoppingthefloor.com
www.etsy.com
Choose your colors from paint swatches and make a mini heart banner for little ones to hold. Or make several and string them all together so one small one does not look "lonely" in the photos.
media-cache1.pinterest.com
Newspaper or book paper hearts are classic and will let the child stand out especially if they have on brightly patterned clothing. The following garlands will blend with almost any clothing combination and allow your little stars to shine.

Shannon Rowe
Visit ticktockvintage.blogspot.com 
studioslyter.blogspot.com

bridegoggles.blogspot.com
Classic red heart and ribbon garland. Use large hearts with different patterned paper and a classic red ribbon. Use this garland as a back drop or have little ones hold it across them.


Felt Hearts
Felt hearts strung alone, or altogether will add that touch of Valentines to your photos. Easy felt hearts can be cut out and strung, sewed together and strung, or with a twist added to pinecones for a different look.

www.dukesandduchesses.com

www.dusty-coyote.blogspot.com

www.vechernie-posidelki.blogspot.com

Hugs and Kisses XOXO
Valentines is all about hugs and kisses. Show some love with these XOXO banners. They can be purchased on Etsy.com or you can cut out felt shapes and make your own. Use a sewing mating to run a simple seam down the middle of xoxo's mixed with colored hearts. 
www.etsy.com
Punch holes in the X's and O's and string them together or use a small dot of hot glue to attach them to a string.
www.etsy.com
Simple scrap book paper is cut out and then threaded through a ribbon for this simple banner. I love the colors, and that it does not have a pattern on it. If it would have had a valentine pattern it would have clashed with her shirt. As it is they compliment each other.
Visit blog.peartreegreetings.com 

Love Birds
Different than your typical Valentines decor these love birds could be the perfect backdrop for Valentine photos. Available at Etsy.com. Should you attempt to make your own find a template of a bird to cut and trace so all of your birds are the same size. Use a Sharpie marker for eyes and small buttons to attach the wing to the body. Twine would work better than ribbon for this project.

www.etsy.com

Puppy Love
This would be easy enough to make if you could purchase di cuts of the shapes. Cutting out each individual shaped dog would be a little too time consuming. Check your local craft store for available shapes. You may not find dogs but other shapes in paper or wood are bound to be available. If you prefer puppy love head over to Etsy.com to purchase this banner.
www.etsy.com

Warm Hands Warm Hearts
Small hearts to let you know it is Valentines placed on a mitten add childish charm. Trace mitten pattern on your choice of paper add a small red heart and string.

www.twostraightlines.typepad.com

Do It With Doilies
Paper doilies can be purchased at Walmart and Target at this time of year. You can also purchase them in bulk online at sites like Oriental Trading www.orientaltrading.com. Choose from a variety of colors and then string the doilies together. 

www.ritamay-days.blogspot.com
Visit Family Fun Magazine for this doily idea. Shaped into x's and left for o's this garland is simple but would stand out on a colored backdrop.

http://www.parents.com/holiday/valentines-day/crafts/sweet-valentines-day-crafts-kids/


Queen of Hearts
Visit the dollar store for a deck or two of playing cards. Add a few types of red ribbon and you have a unique Valentines banner you'll love. Assemble the cards on the floor as you'd like to see them first. Then punch two holes in the top of each card. Lace ribbon in and out and then add accent ribbons in between each card.
Whitney Prawl

Valentine Letter Banner
Create "valentines" envelopes that is out of different colored paper and hang on a ribbon. Little Valentines in the back of a photo would be oh so cute.

Nelliebellie.com


Word Banners
Be Mine, My Valentine, Love, XOXO, Happy Valentines Day. Find your favorite phrase and add it to a burlap banner. Cut the pieces yourself or purchase a blank one and add letters with paint stencils. This one can be purchased at Etsy.com.

www.etsy.com

 Classic Triangle Banner
Fabric, felt, or paper will do. Find at least three different patterns cut out triangles and hang in a pattern. 
 southerncharmportraits.com
Pretty Pipe Cleaners
Pipe cleaners in red, white, and pink bent into hearts and hooked together make a garland or wreath you can use in the background of your photo.

Potterybarnkids.com

Tulle Colored Banner "Ballerina Skirts"
Small pieces of tulle hung on a ribbon resemble ballerina skirts. These would most likely work best for a girl session.

mysocalledcraftylife.com


Valentine Tree
Though not a garland this old tree branch adorned with Valentine heart ornaments has a similar effect of a hanging garland. Try it out and place little ones beneath the branches. Make sure your "tree" is anchored well or you'll have to stop in the middle to fix it and the children may not be eager to get underneath it once it has fallen over on them.
Visit ljcfyi.com

Cupids Arrows
These could be turned into a garland either alone or with hearts added here and there. Simple twigs from your years or local park with bits of felt glued to the tops and bottoms make a version of Cupid's arrows that little ones won't mind holding.

www.loveit.com

There you have it my favorite garlands of the moment. I hope you can use them or use your ideas along with these to make something  uniquely yours for your Valentine photos. 


A few tips to remember when making photo props.

  • Try and keep the colors simple so as not to clash with clothing choices.
  • Make sure your props are finished at least a day in advance of when you plan to take pictures. You don't want drying glue or paint to be an issue.
  • Set up your backdrops before your children or clients are ready. Time is precious with little attention spans when they are ready you should be behind the camera not still setting up.
  • Look around your house for decor items to use in your session. it might surprise you what you already have on hand.
  • If you can let your clients know what type of decor you have available so they can dress their children accordingly.

Check back on Thursday for ideas on Valentine Photo Props, as well as Photo ideas for posing and other tips you might find useful this season. Good luck with garlands. I'd love to see your finished products!


Monday, October 28, 2013

Autumn Decor to last September through November

Autumn is one of my favorite times of the year. The smells, the colors, and the excitement of the holidays. But rather then decorate over and over during such a busy season sometimes it is nice to be able to make Fall/Autumn touches to your home and have them last for 3 full months rather than a few weeks. So a few ideas to help get you through the Autumn season. Of course you can add in Halloween decor for the month of October but take it down and you are still left with fall colors that will work for November.

  • I bought I small sprig of leaves from a local craft store for $1.50. However, it did not look like this when I bought it. It was much smaller and a little sad looking. I found some fake leaves and added a few more to the ones already there. I also found a few pinecones from the local park and glued them on to add more visual interest to it. Finally I added a burlap ribbon from my scrap box and stepped back to a finished product. I chose to hang it in my kitchen but it could be placed on a mantel, in a wreath, or anywhere you choose.


  • A leaf garland from the Dollar Store adds color and interest. Two face pumpkins from Walmart were 1.00 each and also add color and a festive touch.


  • Pinecones, another 1.00 garland, a glass jar, and a candle holder complete the mantel. A thank you note adds a personal touch.


Sunday, October 27, 2013

DIY Halloween Felt Ornaments


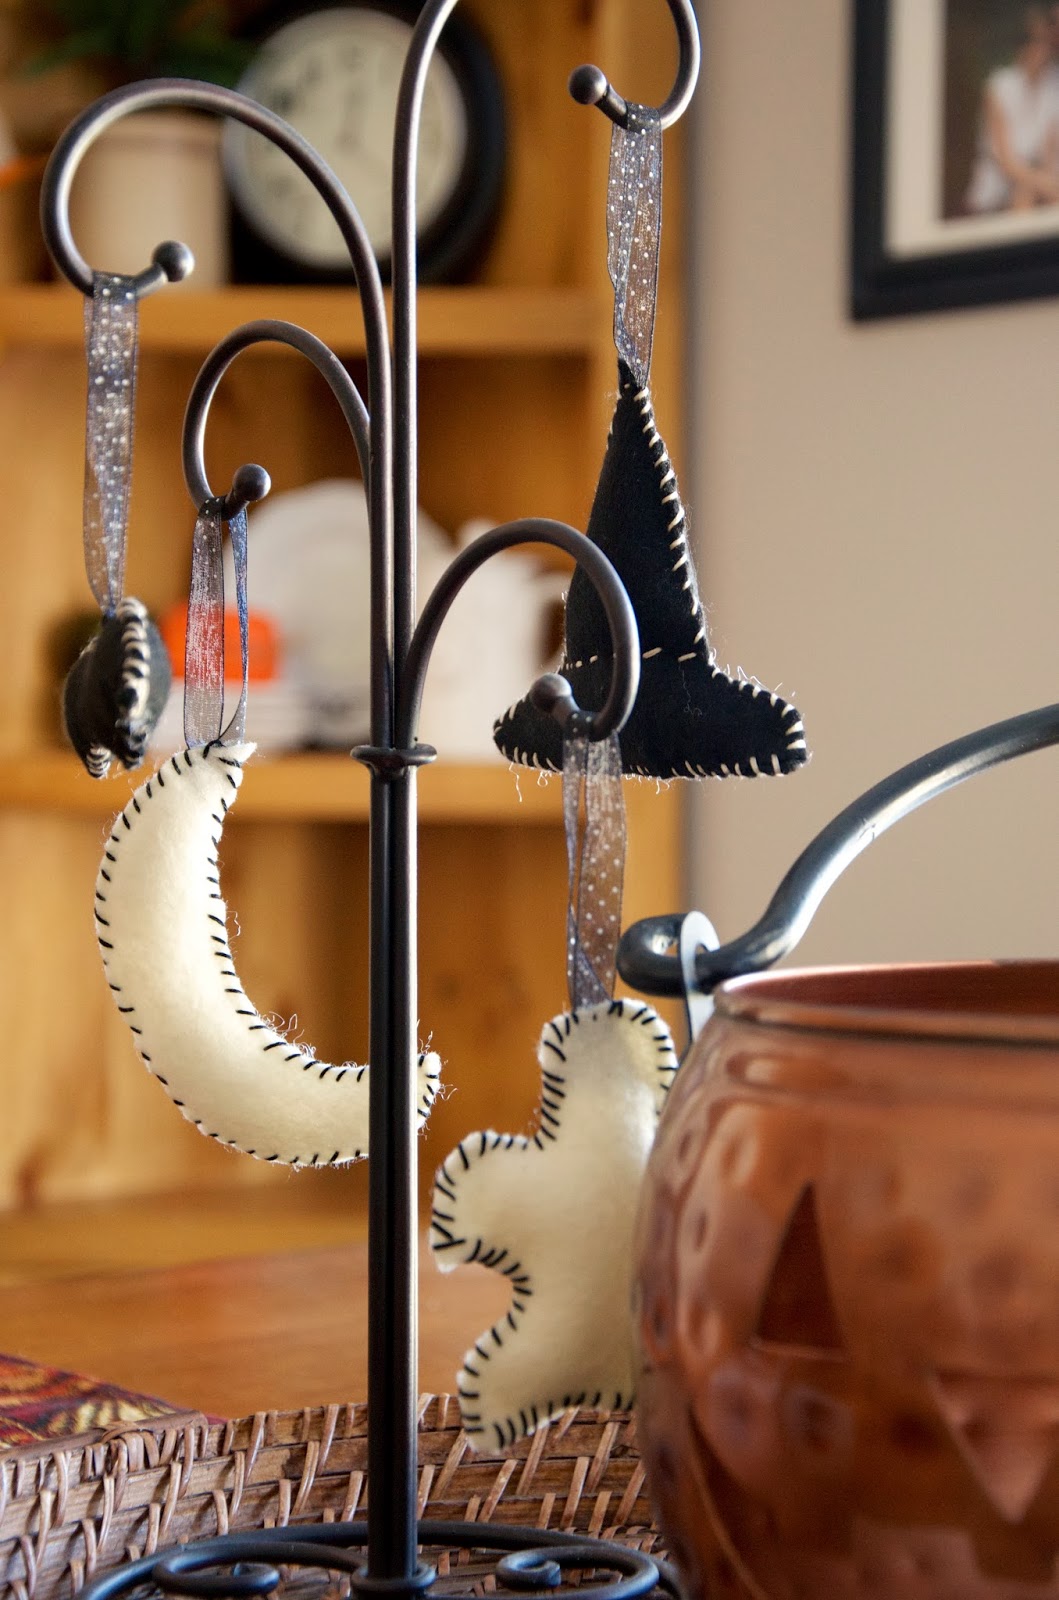
I wanted a Halloween decoration that my toddler could play with that would not get ruined and that did not cost me money. So to the closet of random goods I went. I found some felt and embroidery floss and decided to make some ornaments for this "Halloween Tree." It is actually supposed to be for tea cups but I use it for a variety of things during the year. I did not have cookie cutters or anything to trace my ornaments so I just did them by hand as I went with some scissors. 

If you can't tell from the photo the two white ornaments are a moon and a ghost, and the black ornaments are a witch hat and a bat.

Fairly simple instructions: (I did them by hand but you could use a sewing machine if you wanted.) (Little girls love this project that are just learning to sew. )

Cut two matching pieces. 

Use thread to stitch them up.

Leave a small hole to fill with poly fill or other stuffing.

Add ribbon at the top.

You could easily bring in some old branches or twigs from your yard or park and put them in a container of some kind to make a Halloween Tree. Let the kids decorate and play. 


Saturday, October 26, 2013

Trick or Treat Decor

I want to say I feel bad about this but I don't. I keep EVERYTHING well almost everything for a few months even if I don't like it or know what to do with it. I have a large box with random items in it. Why you ask? You never know when you will be able to use something for another purpose. This is the perfect example. 

I was given two of these as a gift a few years back. It had the name of our family on it and our wedding date. What do I need two for? So I kept this one and recently decided to paint over it and turn it into a Halloween decoration. A little black paint covered the letters and I was then able to use a gold sharpie marker to write Trick or Treat on it. The images ... those took me a day or two to figure out. I used the gold sharpie to color a stamp and then stamped it onto the wood. I'm thinking I'll change the leaf in that top right corner on Trick. It did not turn out as I'd have liked. But all in all I'm happy with it. I'm thinking about writing something on the back for Thanksgiving so I have another piece of decor for the cost of oh NOTHING. Can't beat that. 

So see what you can find and see in a new light. You might be surprised at what can be changed into something else.

Friday, October 25, 2013

Halloween and Fall Wreath's

I know everyone is busy. I realize it more and more everyday as I find myself with more to do's then I know what to do with and no time. But there is something about making your home festive for the Holidays. It helps create memories for your family and especially your little ones. 

As I've been thinking about a lack of time and how to handle it I've  decided there are  few ways to go about it. Either do things sloppily, which would drive me insane because I like things done right. Or drive myself crazy trying to find time among a million other things that need done to do large elaborate projects that look amazing. Or last and my chosen method, find ways to simplify so I can do a bit of everything. 

So rather than show you a long winded project I have more of a challenge for you. 

Look around your house and see what you already have that you can add to quickly or buy something small to add. In the picture below I bought this wreath almost 4 years ago. It is just a basic twig wreath from Michaels Craft but I love it because I can add small things to it each season and make it different. One of my Halloween decorations a half moon got a makeover with some ribbon and then I tied it to the side of the wreath so it looks like it belonged there all along.


This wreath below is similar. Basic white berries can have other berries, pinecones, small pumpkins, flowers, or any number of things added depending on the season. If you need berries or flowers you can usually find them at a craft store for just a few dollars for a stem of them. Easy, Easy. So adding that moon to my wreath was my accomplishment for the day and finished up my outdoor Halloween decor. Don't worry that is my only decor this year. With a new little one its lucky I have any at all. So no judging. :)


Thursday, October 24, 2013

DIY Fall Pillows


After looking at so many really cute decorative pillows in the stores I talked myself into needing one but they are so expensive. Especially when you are only going to use them for a month or two. So here is my solution.... Make your own but do it the easy way. I'm not a seamstress by any means though I wish I was. Instead I looked for placemats. Seasonal placemats. Placemats that were good and sturdy. Placemats that could work for the whole fall season rather than just Halloween. I found this cream leaf embroidered one and a pumpkin. Got them home, found my seam ripper and went to work. 

After making a small opening in the base of each pillow I stuffed it with poly fill and hand stitched it closed again. Done. From placemats to pillows. Each placemat was $3.99 and a bag of fill was around $5. But I still have quite a bit left for other projects. I'm thinking each pillow cost me about $5 each which definitely beats the $30 plus pillows I was admiring and I LOVE how mine turned out. May try it again for Christmas! We ll see. Good luck if you try it. Very simple. Don't worry if you cannot sew. With this project it's easy to hide mistakes on such a small hole. 

HAPPY FALL!